
Target Your Enemy!
The weapons listed below are all used in Worms 4: Mayhem. For more information, go to their articles.
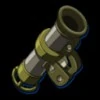
Bazooka[]
The most basic of weapons, but also one of the most effective weapons if used by a skilled player. If a worm can not be shot in a straight line due to an obstruction, it is possible for you to bend a shot round the obstruction by using the wind.
Just because the Bazooka is usually in infinite amount does not mean you should overlook its great versatility.
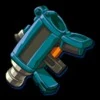
Homing Missile[]
The Homing Missile is an effective weapon to reach those hard to get targets. It is usually in short supply, so only use it when you really need it. Remember that when you fire the Missile it will take about a second or so to lock onto the target.
Once locked on, the Homing Missile will only search for the target for about 5 seconds, after this it will lose power and drop to the ground gradually, so make sure your target isn't too far away.
Shotgun
[]

The Shotgun is the only weapon in the game which can be fired twice in one turn. You should try and use this to your advantage.
Shooting barrels will result in a large explosion, so bear this in mind if an enemy worm is situated near them. Also if enemy worms are residing near the edge of a big fall, the Shotgun can be used to push worms over the edge.
The Shotgun can be used to move mines, so bear this in mind when an enemy is around or simply if the mine is in your path.
Sniper Rifle[]

If you can see your long distance enemy in a straight line then this is the best weapon to use. Even though you can have a couple of efforts with the Shotgun, the Sniper Rifle offers a far higher level of accuracy with its zoom feature.
When in First Person view it is easier to zoom as far as you can outwards, find roughly where your target is, then zoom inwards as far as you need to.
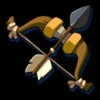
Poison Arrow[]
If there's a large group of enemy worms very close to each other, 'Shoot that Poison Arrow'. Try to shoot the Arrow into the middle of enemy worms, or as near as you can. The ten points a worm will lose in between turns can soon add up quickly.
Also the Poison Arrow can have a great deal of power when launched over great distances. Try using this when an enemy target is out of reach of a lot of other weapons.
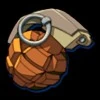
Grenade[]

Remember these Grenades will not explode on impact, so if you can't see an enemy directly, try bouncing a Grenade off a wall to get around an obstacle.
If the player puts the Grenade fuse on 5, the Grenade can be used like Dynamite, simply aim straight down and tap the fire button and then runaway. This guarantees a direct hit to the opponent.
Cluster Bomb[]
When throwing the Cluster Bomb, try timing it to detonate over your target as it's often hard to get them to stop dead on the ground.
Always remember that the spread of the clusters when the bomb is set off is fairly random and widespread so make sure your worm has made a safe retreat.
Gas Canister[]
Like the Poison Arrow, it's good to drop the Gas Canister in a large group of enemy worms.
Unlike the Poison Arrows though, your worm has a chance to retreat if it's dropped a bit too close.
Banana Bomb[]

The Banana Bomb works in the same way as the Cluster Bomb; however, it has far more of a kick. The spread of bananas after the initial blast will be a lot larger.
This weapon is ideal for shifting low land and making it harder for the enemy to avoid the drink. If an enemy worm is in a compacted space, this weapon may deliver quite the punch in an attempt to finish off your opponent.
The Banana Bomb is unpredictable and will bounce off anything, so if your enemy is not in sight, try bouncing the Banana off a wall.
Continued on Weapons Guide: Part Two